Deutsch
 English
Optimal Tuning
How to achieve an optimal tuning?
Have you ever asked yourself whether an unsatisfactory result on the the target is caused by your own shooting faults, or perhaps the material is not optimally tuned?
For us personally, this question was actually one of the reasons why we developed RyngDyng. This uncertainty as to whether the settings are correct or not, and trying around with the various parameters, can be grueling.
Our developer Jochen is a specialist in data analysis and has recognized that this problem can be solved through a systematic approach and clever analyzes - if only one could measure and record many arrow positions. And that's how it all started ...
It has since grown into a whole arsenal of tools and analyzes that support you in finding the optimal settings for your bow and arrows. If you want to go deeper here, we recommend reading our our White paper Tuning and Data Analysis .
Example: Brace Height
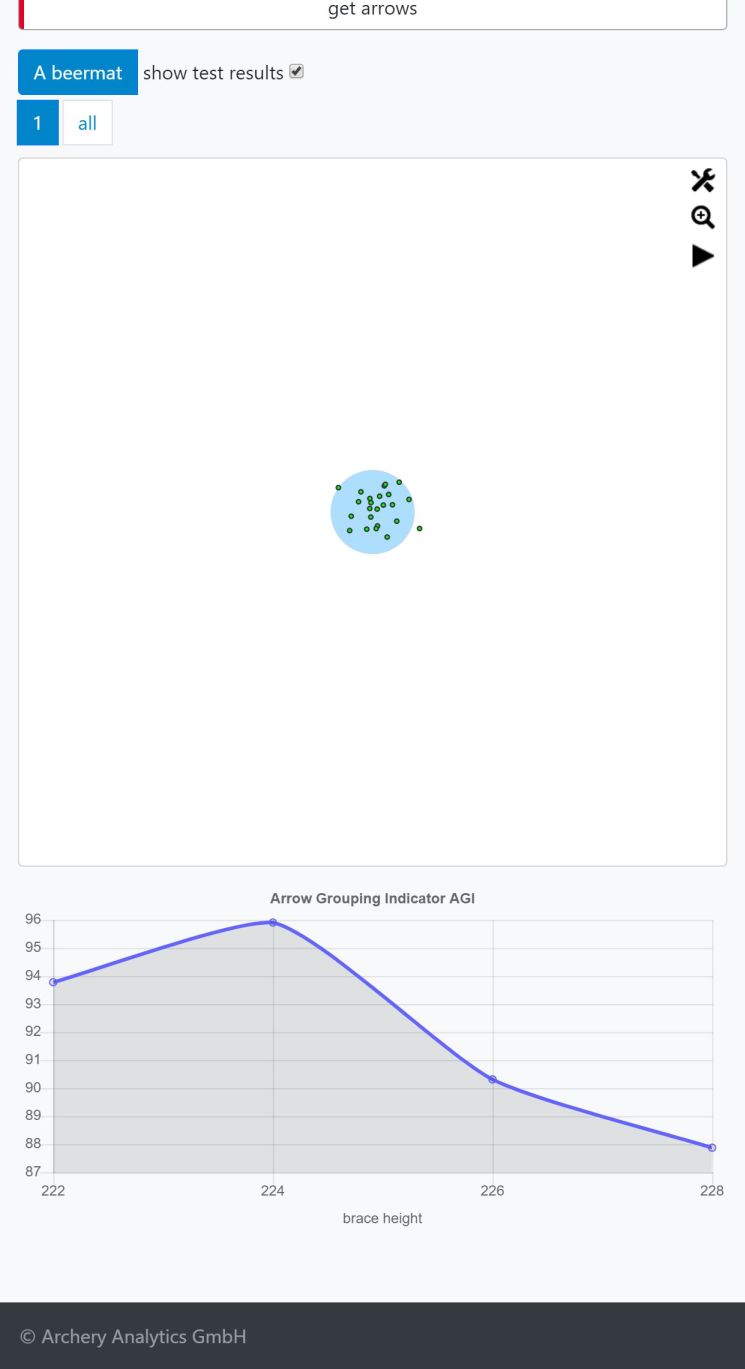
The brace height is a parameter that has a very large influence on the quality of the shooting result. After the basic setting of the bow, you will first optimize the brace height and then keep it unchanged during the tuning of the other parameters.
The manufacturers of bows specify a wide range of 6-10 mm for the brace height. Instructions for bow tuning also only make vague statements about it. The recommendation applies that the shot 'sounds good' when the brace height is set well, which is also only a rough indicator.
The optimum for the brace height setting can only be achieved through grouping tests. You vary the brace height in the recommended range and assess the grouping of the arrows. However, this is not easy when you can actually only see one end of arrows as a group. With RyngDyng you simply record several ends, overlay them and calculate the Arrow Grouping Indicator (AGI). This is the objective measure of the grouping of arrows.
The RyngDyng App also offers a special grouping test in which the measured AGI can be displayed as a curve depending on the brace height. In the picture on the left you can see how the AGI assumes a maximum value at a brace height of 224 mm. With this brace height the bow has the best arrow grouping.
Example: Plunger
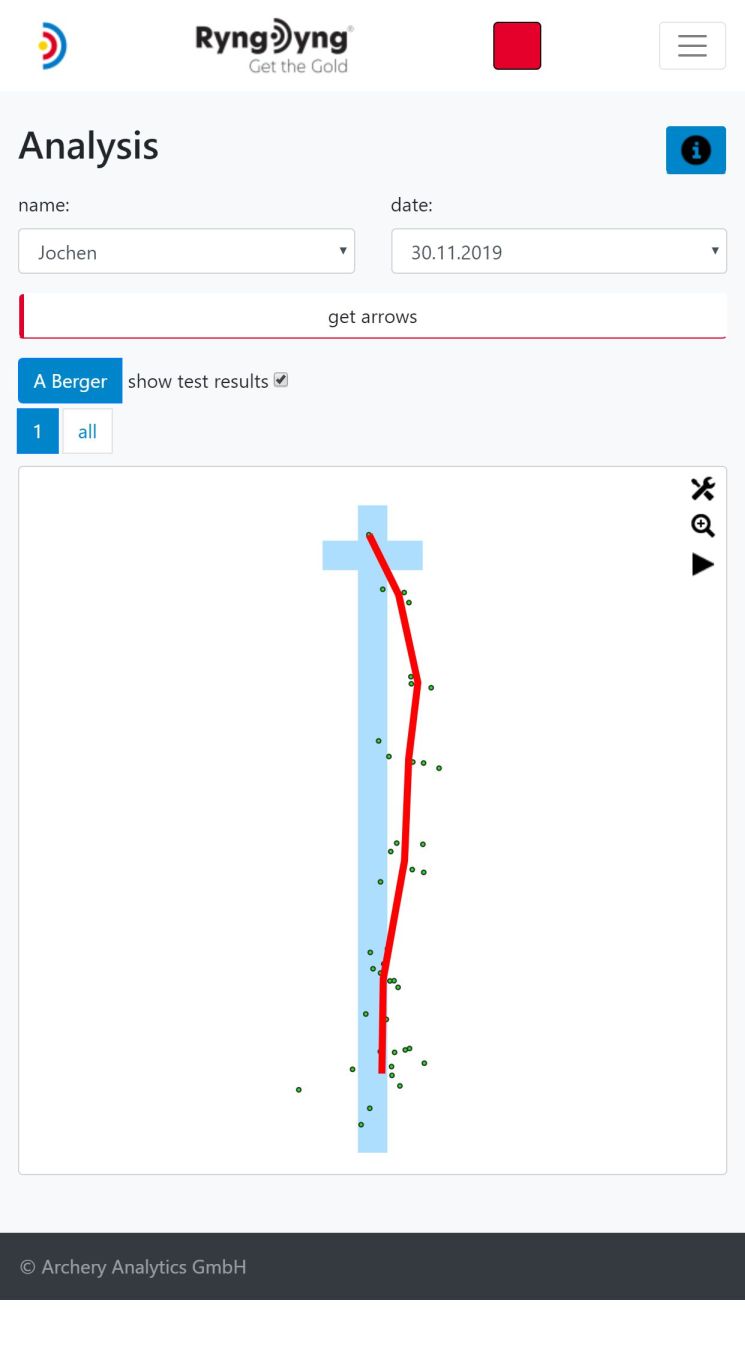
The established procedure for the exact setting of the hardness of the button spring is the Berger test.
In the Berger Test, you always shoot an arrow at the same target point and then gradually increase the distance. The arrows land lower and lower on the target and therefore result in a line running from top to bottom. From the course of the line you can draw conclusions about how the position of the button or the hardness of the spring should be changed in order to achieve an optimal setting.
One problem with carrying out the Berger test is that as the distance increases, the dispersion of the arrows also increases and thus a pattern often arises purely by chance, which would look different again when repeated. That is why Archery Analytics developed the statistical Berger test, in which you can shoot any number of arrows from any distance. Then the Berger line is calculated from the many arrows using statistical methods. In this way, an optimal setting of the plunger can be achieved with high reliability.
The picture on the right shows an example of a statistically calculated Berger line as it is displayed in the RyngDyng App. For details on the process, see our White paper Tuning and Data Analysis for archery.